Before checking if there's a problem with your DNS settings, you need to find out if the problem is with your computer set-up, or.....
Before checking if there's a problem with your DNS settings, you need to find out if the problem is with your computer set-up, or with the website you're trying to view. Try entering the address of a different website, such as www.google.co.uk. If you can view and use the Google then your set-up is okay and the fault is with the website you were originally trying to visit.
If you can't use another site you need to check your DNS settings:
- Click on Start, select Control Panel then double click on Network Connections
- Right-click on the network connection in use and select Properties
- Double click on Internet Protocol (TCP/IP)
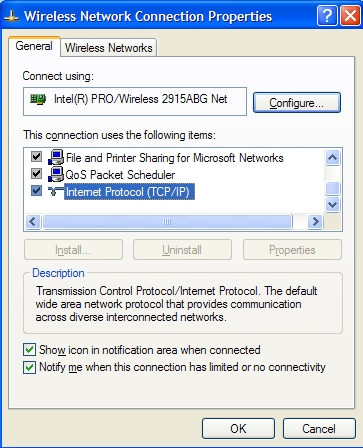
- Make sure “Obtain an IP address automatically” is selected
- Make sure "Obtain DNS server address automatically" is selected
- Click on Start and select Control Panel
- Double click on Network and Internet then Network and Sharing Center
- If the Control Panel is set to Classic View you can select Network and Sharing Center directly
- Select Manage Network Connections
- Right click on the network connection in use and select Properties
- Select Internet Protocol Version 4 (TCP/IPv4) and select Properties
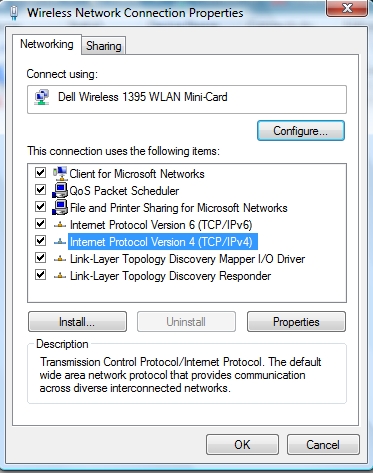
- Make sure “Obtain an IP address automatically” is selected
- Make sure "Obtain DNS server address automatically" is selected
- Click on Start and select Control Panel
- Double click on Network and Internet then Network and Sharing Center
- If the Control Panel is set to Classic View you can select Network and Sharing Center directly
- Select Change Adapter Settings
- Right click on the network connection in use and select Properties
- Select Internet Protocol Version 4 (TCP/IPv4) and select Properties

- Make sure “Obtain an IP address automatically” is selected
- Make sure "Obtain DNS server address automatically" is selected
- Hold down the Windows key and press X, then select Control Panel from the list
- In Control Panel, double click on Network and Internet, then Network and Sharing Center
- Select Change adapter settings
- Right click on the network connection in use and select Properties
- Select Internet Protocol Version 4 (TCP/IPv4) and select Properties

- Make sure “Obtain an IP address automatically” is selected
- Make sure "Obtain DNS server address automatically" is selected
- Hold down the Windows key and press X
- Select Control Panel and click Network and Internet then Network and Sharing Center
- Select Change Adapter Settings
- Right click on the network connection in use and select Properties
- Select Internet Protocol Version 4 (TCP/IPv4) then Properties
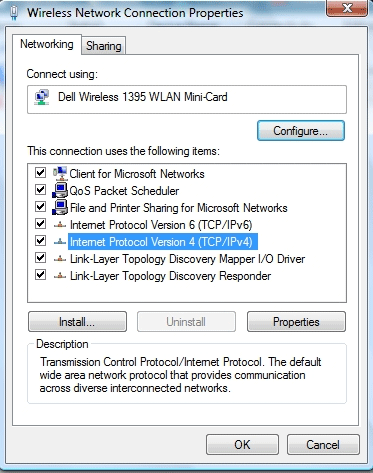
- Make sure Obtain an IP address automatically and Obtain DNS server address automatically are selected
- Click on the Apple symbol in the top left hand corner and select System preferences
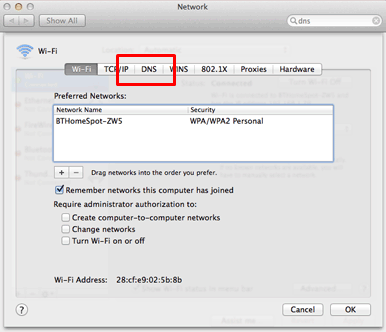
- From the System Preferences screen select Network

- Select the network you want to check DNS settings for then click Advanced
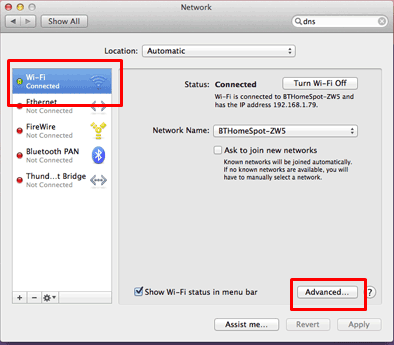
- Select the "DNS" tab
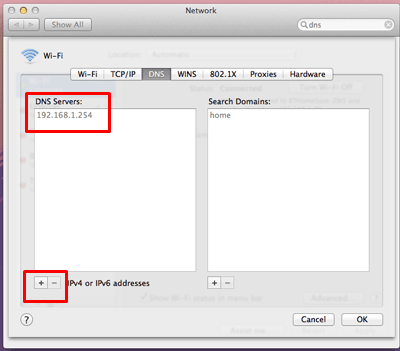
- By default, you should see 192.168.1.254 in grey under DNS servers. If there is another number there, you can remove it by clicking the 'minus' sign at the bottom of the panel. Click the 'plus' sign to add the correct DNS settings
Internet Matters
As part of our commitment to Internet safety for children, BT support the work of Internet Matters, an online support service for parents wanting to get advice and tips about keeping their kids safe online.
